Asif junaid_admin - Page 5 of 8

Author name: Asif junaid_admin

Where to Stay in Lisbon

Where to Stay in Lisbon

Are you planning a trip to Lisbon, the enchanting capital of Portugal? Nestled along the scenic shores of the Atlantic Ocean, this vibrant city is a treasure trove of history, culture, and culinary delights. To ensure your stay in this picturesque destination is nothing short of extraordinary, choosing the right accommodation is paramount. In this detailed guide, we’ll explore the various neighborhoods and options for lodging in Lisbon And Toronto, providing you with insights, tips, and personal anecdotes to make your decision easier. Understanding Lisbon’s Neighborhoods Before delving into specific lodging options, it’s essential to familiarize yourself with Lisbon’s diverse neighborhoods. Each area boasts its own unique charm, catering to different preferences and interests. 1. Alfama: Where History Meets Authenticity As the oldest neighborhood in Lisbon, Alfama is a labyrinth of narrow streets, historic buildings, and Fado music echoing through the air. If you’re a history enthusiast or seeking an authentic experience, Alfama is an ideal choice. Guesthouses and boutique hotels tucked away in centuries-old buildings provide an intimate setting for your stay. 2. Baixa: The Heart of the City For those who prefer a central location, Baixa is the heartbeat of Lisbon. With its grand squares, elegant architecture, and bustling streets, this area offers a mix of upscale hotels and budget-friendly options. From here, you can easily access major attractions like Rua Augusta Arch and Commerce Square. 3. Bairro Alto: Lively Nights and Bohemian Vibes If you’re a night owl or enjoy a bohemian atmosphere, Bairro Alto is your haven. This neighborhood comes alive after dark, with its narrow streets filled with lively bars and intimate clubs. Hostels and trendy boutique hotels cater to a younger crowd, making it an excellent choice for the adventurous traveler. 4. Chiado: Art, Culture, and Elegance For a blend of art, culture, and elegance, look no further than Chiado. This area is renowned for its theaters, art galleries, and upscale shopping. Luxurious hotels and charming apartments offer a sophisticated stay, and you’ll be within walking distance of landmarks like the Sao Carlos National Theater. 5. Belém: A Historical and Culinary Paradise If history and culinary delights are on your agenda, set your sights on Belém. Home to iconic sites like the Belém Tower and the Jerónimos Monastery, this district offers a tranquil escape. Opt for a charming bed and breakfast to immerse yourself in the local atmosphere. Choosing the Right Accommodation Type With Lisbon’s neighborhoods in mind, let’s explore the various types of accommodations available, catering to different budgets and preferences. 1. Hotels: Luxurious Comfort Hotels in Lisbon range from luxurious establishments with panoramic views to charming boutique hotels steeped in history. If you’re looking for top-notch service and amenities, consider staying in a renowned hotel in Chiado or Baixa. These establishments often provide a seamless blend of comfort and sophistication. 2. Apartments: Home Away From Home For a more personalized experience, renting an apartment might be the perfect choice. This option is particularly popular in neighborhoods like Alfama, where you can wake up to the sound of Fado music and enjoy a leisurely breakfast on your private terrace. Websites like Airbnb offer a plethora of choices, ensuring you find the perfect home away from home. 3. Hostels: Social and Budget-Friendly For budget-conscious travelers seeking a social atmosphere, hostels are scattered throughout Lisbon, especially in areas like Bairro Alto. Not only are they economical, but hostels also provide an excellent opportunity to meet like-minded travelers. Hostelworld is a valuable resource to discover and book hostels that align with your preferences. 4. Guesthouses and Bed & Breakfasts: Intimate Retreats For a more intimate and local experience, consider staying in a guesthouse or bed and breakfast. These accommodations are often nestled in the heart of historic neighborhoods like Alfama and offer a glimpse into the city’s authentic charm. Websites like Booking.com can help you find the perfect guesthouse tailored to your needs. Personal Anecdotes: A Glimpse into Lisbon’s Hospitality To illustrate the warmth and hospitality of Lisbon’s accommodations, let me share a personal anecdote from my stay in a charming bed and breakfast in Alfama. Nestled in a quiet alley, the guesthouse exuded a timeless charm, with its tiled floors and vintage decor. Each morning, the owner would serve a delightful breakfast featuring local pastries and freshly brewed coffee. One evening, as I sipped wine on the terrace overlooking the city, the owner shared stories of Alfama’s rich history, creating a connection between the past and the present. This experience highlighted the unique charm of staying in a smaller establishment, where personal attention and local insights elevate your visit to a truly immersive experience. Step-by-Step Guide to Booking Your Stay Now that you have a better understanding of Lisbon’s neighborhoods and accommodation options, let’s walk through a step-by-step guide to booking your stay. Step 1: Define Your Preferences Start by defining your preferences. Are you drawn to historical charm, vibrant nightlife, or a tranquil retreat? Knowing your priorities will help narrow down the neighborhood that aligns with your interests. Step 2: Set a Budget Determine your budget for accommodation. Lisbon offers options for every budget, from budget-friendly hostels to luxurious hotels. Websites like Expedia and Booking.com allow you to filter options based on your financial plan. Step 3: Research Neighborhoods Delve deeper into the neighborhoods that match your preferences. Use online resources such as Visit Lisbon to gather information on each district’s unique character, ensuring it aligns with your desired experience. Step 4: Explore Accommodation Types Consider the type of accommodation that suits your travel style. Whether it’s a cozy bed and breakfast in Alfama or a sleek hotel in Chiado, understanding your preferred lodging type will streamline your search. Step 5: Read Reviews Before finalizing your decision, read reviews from fellow travelers. Websites like TripAdvisor provide valuable insights into the experiences of others, helping you make an informed choice. Step 6: Book in Advance Lisbon is a popular destination, and accommodations can fill up quickly, especially during peak seasons. To secure your ideal

Where to Stay in Lisbon Read More »

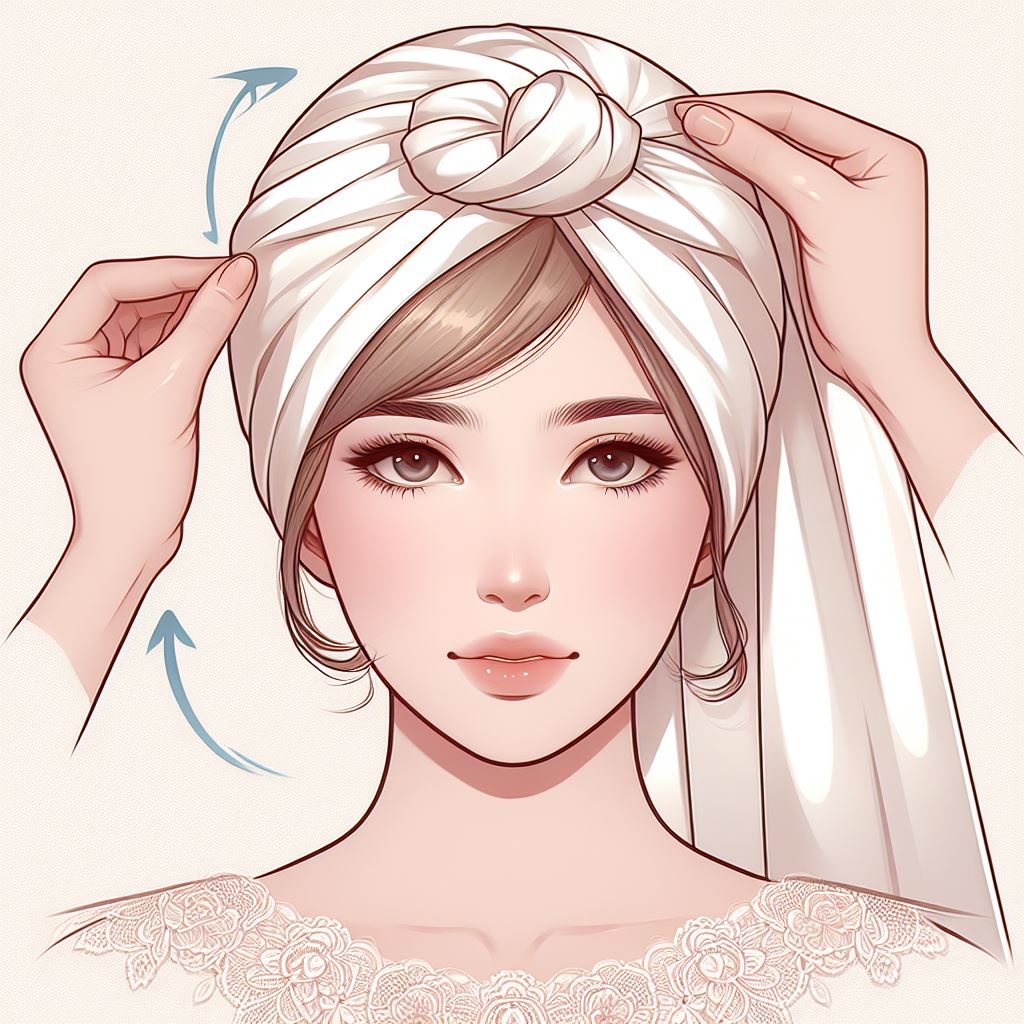
Tied A Silk Head Scarf beautifully

How To Tie A Silk Head Scarf

Silk is perfect for headscarves due to which it feels soft and comfy on your skin. It’s great for any weather because it lets air through, keeping you cool in the heat and warm when it’s chilly. Your hair will love it too. Silk is gentle, reducing frizz and breakage.  Plus, it looks fancy with a nice shine, adding a touch of elegance to your style. Silk scarves are versatile, easy to tie in different ways, and they last a long time if you take good care of them. So, wearing a silk head scarf not only feels good but also makes you look and feel stylish. Selecting the Perfect Silk Scarf When picking the perfect silk scarf, focus on the fabric. Mulberry silk is fantastic—it’s super smooth and lasts a long time. It feels nice on your skin, like a touch of luxury. Check for lightweight silk for warmer days and slightly heavier silk for when it’s a bit chilly. This way, your scarf is comfy and ready for any weather. Size, Shape, and Styling Versatility Think about the size and shape you like for your scarf. Square scarves are awesome because you can tie them in so many cool ways. Like knots, bows, or even a fancy turban twist.  And when choosing colors and patterns, go for ones that match your clothes. This way, your silk scarf becomes the perfect finishing touch to your outfit, making you look stylish for any occasion. Prepping Your Hair for the Perfect Wrap It’s important to understand your hair. Different hair types and styles may influence the best way to prep and wrap your hair. For example, curly hair might benefit from a bit of moisture or a leave-in conditioner to help with smoothness, while straight hair may not need as much prepping. Knowing your hair type sets the stage for a perfect silk scarf wrap that complements your unique locks. Optional Prepping Techniques for a Stylish Hold Once you’ve got a handle on your hair type, consider optional prepping techniques for that extra stylish hold. These could include a light mist of water for added flexibility, or using a styling product that suits your hair type to enhance texture and shape. These optional steps ensure that your silk scarf not only looks fabulous but also stays securely in place, allowing you to flaunt your stylish wrap with confidence. Elevating Your Style with Advanced Tying Techniques Elegance with the Turban Twist Ready to take your silk scarf styling to the next level? Try the Turban Twist, an advanced tying technique that exudes sophistication. Follow the step-by-step guide for a chic look, and don’t hesitate to explore variations to personalize your style. The Turban Twist is perfect for elevating your fashion game on special occasions or when you simply want to make a statement with your headscarf. Creating a Statement with the Bow Tie For an extra touch of glamor, consider the Bow Tie technique. Learn the elegant steps to tie a bow with your silk scarf, and discover variations suitable for different looks. Whether you’re heading to a formal event or just want to add a playful element to your outfit, the Bow Tie technique is a versatile way to elevate your style and express your individuality. Ensuring Longevity For the longevity of your silk head scarf, proper care is key. Follow the recommended cleaning guidelines to maintain its quality. Typically, handwashing with a mild detergent is ideal for preserving the delicate fibers of silk. Avoid harsh chemicals and opt for air-drying to prevent any damage. By treating your silk head scarf with care, you ensure it stays as luxurious and beautiful as the day you got it. Storing Your Silk Head Scarf Proper storage also plays a crucial role in preserving the lifespan of your silk head scarf. Store it in a cool, dry place away from direct sunlight to prevent color fading. Avoid hanging the scarf, as it could stretch the fabric. Instead, gently fold or roll it and place it in a drawer or on a shelf. Taking these simple steps in caring for and storing your silk head scarf will contribute to its longevity, allowing you to enjoy this elegant accessory for years to come. Drawing Inspiration for Stylish Ties Everyday Chic Styles Looking to add a touch of sophistication to your everyday look? Explore chic styles like the Classic Head Wrap or the Knotted Headband. These are simple yet stylish ties that effortlessly elevate your appearance. With minimal effort, you can turn your silk head scarf into a fashion statement, perfect for any casual day out or a quick errand. Formal Occasions and Elegant Wraps For more formal occasions, consider elegant wraps like the Turban Twist. This advanced tying technique exudes grace and is perfect for events where you want to make a lasting impression. Pair it with your favorite formal outfit, and you’re ready to turn heads with your impeccable style. Casual Weekend Vibes Planning a laid-back weekend? Embrace casual styles with your silk head scarf, such as a simple loose wrap or a stylish Bow Tie. These ties add a playful element to your outfit, making them perfect for relaxed weekend outings or brunch with friends. With these inspirations, you can effortlessly incorporate your silk head scarf into various aspects of your life, expressing your unique style on any occasion. Conclusion Tying one is not just about style. It’s about celebrating your unique charm. The smooth feel of silk against your skin and the countless ways to tie it make this accessory a confidence booster. From basic wraps to fancy twists, your silk scarf is a canvas for expressing your style on any occasion. Remember, it’s not just about fashion; it’s about embracing the comfort and luxury of silk in your life. Whether you’re heading out for a casual day or a special event. Your silk head scarf is more than an accessory, it’s your statement piece. So, tie it with pride, knowing that

How To Tie A Silk Head Scarf Read More »

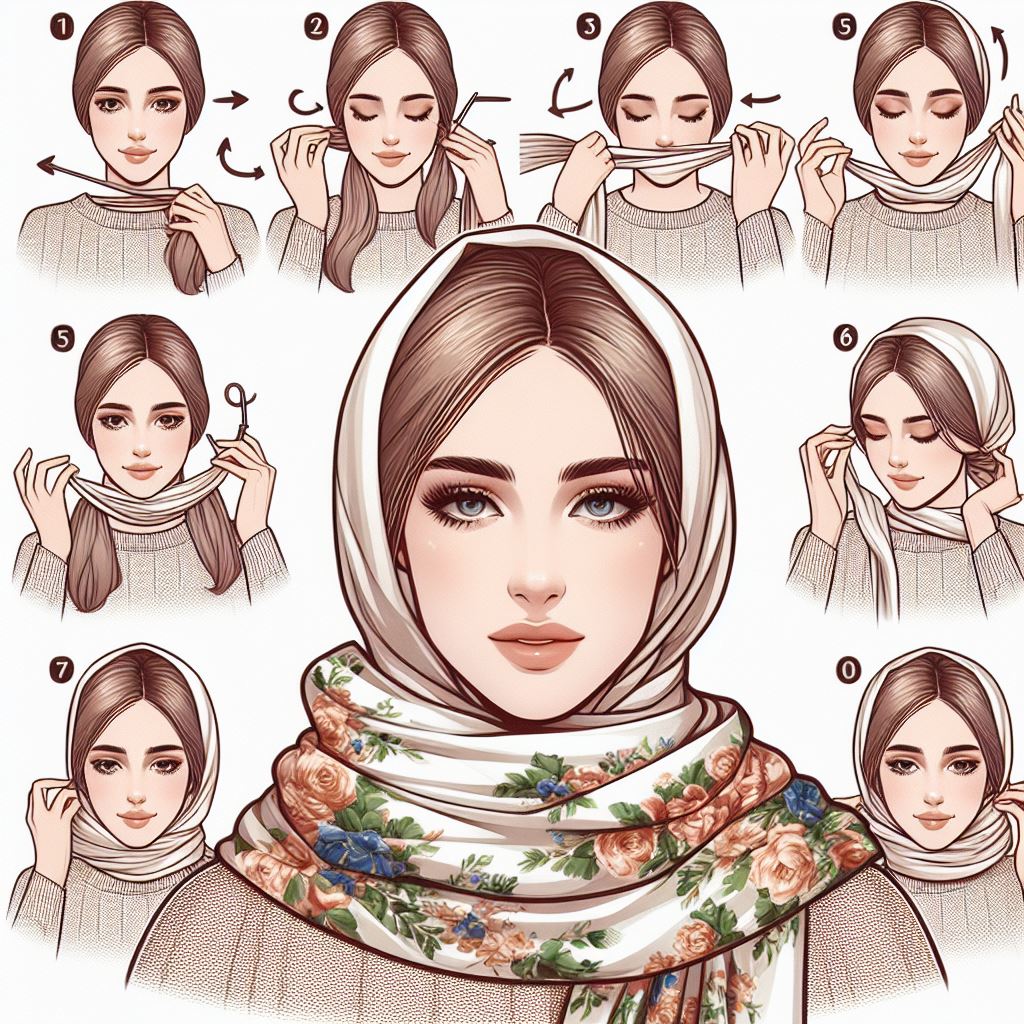
A Scarf Around beautifully her Head

How To Tie A Scarf Around Your Head

Wearing a scarf on your head can be both helpful and stylish. First, it keeps you warm in cold weather and protects you from the sun on warmer days. Plus, adding some pizzazz to your outfit is a cool way. Scarves come in lots of colors and patterns, so you can match them with your clothes and make your style pop. Also, scarves are handy when your hair isn’t cooperating or on days when you just want a different look. They’re like a fashion secret weapon! Different cultures use scarves to show their traditions, and it’s a fun way to celebrate your background. Whether you’re going to a fancy event or just hanging out with friends, there’s a scarf style for every occasion. Coordinate scarf colors with your outfits Coordinating scarf colors with your outfits can enhance your overall look. Techniques for Tying a Scarf Around Your Head Tying a scarf around your head can be a stylish and practical way to accessorize. Classic Head Wrap Turban Style Bow-Tie Headband Top Knot Wrap Twisted Crown Side Knot Headband Stylish Variations for Different Occasions Adapting your scarf style to different occasions adds a touch of flair to your overall look.  Casual Daytime Looks Effortless Wrap: Keep it easy-going by draping a scarf gently around your head, allowing a few strands to hang casually. Front Knot: For a relaxed outing, tie a small knot at the front, giving your look a touch of chic charm. Elegant Evening Styles Glamorous Turban: Elevate your style for formal events with a silky or sequined turban-style scarf, tucking in loose ends for a polished finish. Braided Headband: Create an elegant look by weaving a long scarf into a braid along your hairline, perfect for dinners and parties. Boho-Chic Vibe Bohemian Headscarf: Embrace a carefree, boho-chic vibe by tying a patterned scarf with a loose knot at the back, letting the ends flow freely. Wrapped Crown: Playful and eclectic, wrap a colorful scarf around your head like a crown for a bohemian touch to your outfit. Professional Touch Low Bun Wrap: Add a professional touch by pairing a neutral scarf with a low bun, wrapping the scarf neatly around the base. Knotted Headband: Keep it subtle yet sophisticated with a small knot at the top of your head, ideal for professional settings. Festive Celebrations Bun Wrap with Ribbons: Get festive by securing a bun with a scarf. Letting the ends hang like ribbons is perfect for parties and holidays. Side Twist Knot: Add a lively touch with a side twist, tying a knot at the opposite side for a spirited appearance. Beach or Outdoor Gatherings Sun Protection Wrap: Stay stylish and sun-safe by folding a lightweight scarf into a wide headband during beach outings or outdoor events. Loose Boho Wrap: Capture a relaxed beachy vibe by draping a scarf loosely around your head, letting it flow with the breeze. Experiment with these styles based on your mood and the occasion. Enjoy the versatility of scarves in expressing your unique fashion sense. Conclusion Tying a scarf around your head isn’t just about staying warm or looking cool. It’s about showing off your unique style. Whether you’re going for a relaxed day out, a fancy dinner, or a fun beach day, scarves are your versatile fashion friends. Remember, there are no strict rules in scarf fashion. It’s all about having fun and being creative. Mix and match colors, try different knots, and let your scarf reflect your personality. Your head scarf is like a canvas, and how you tie it tells a story about you.  So, don’t be shy wrap it up, knot it, and let your scarf be your style signature. With these easy techniques, you’ve got endless ways to make your head scarf uniquely yours.

How To Tie A Scarf Around Your Head Read More »

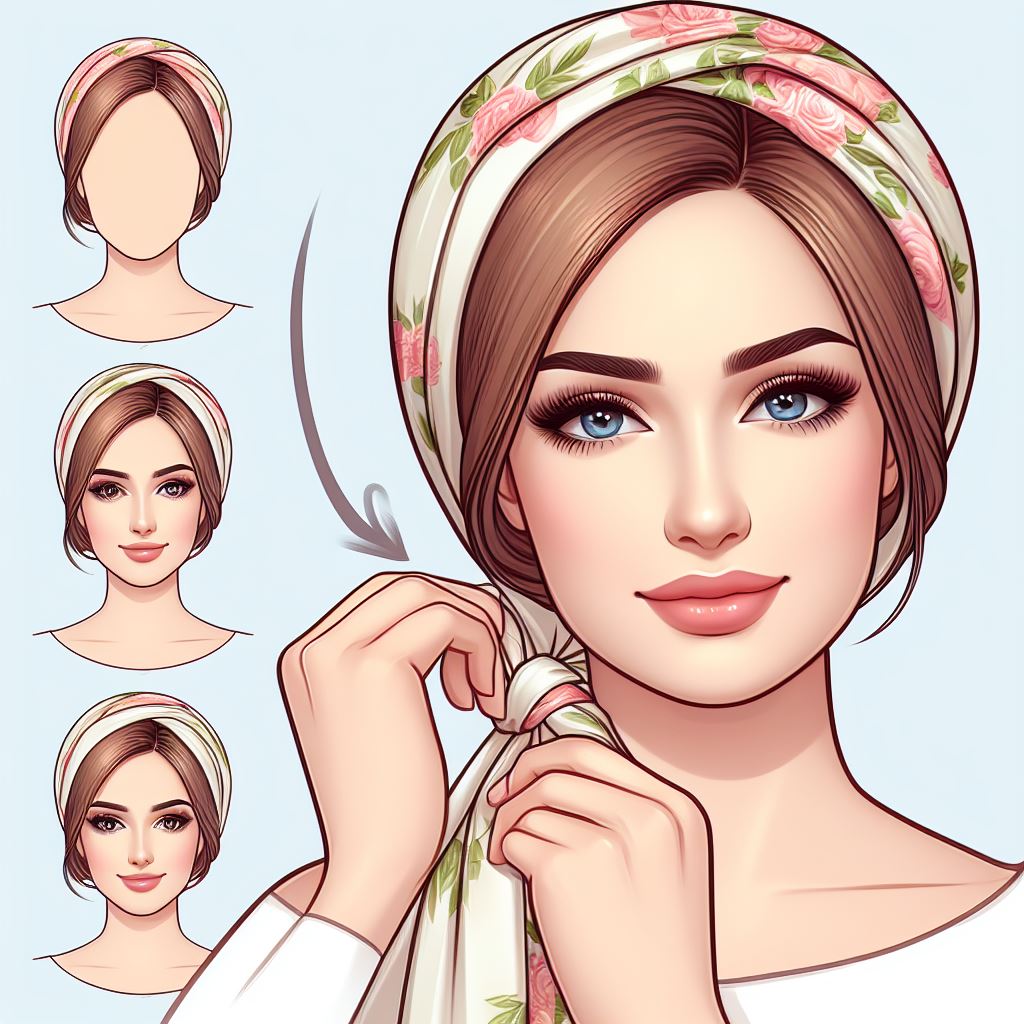
A beautifully tied Headscarf

How To Tie A Headscarf

People wear headscarves for different reasons. Some wear them to look stylish and unique. Others wear them for cultural or religious beliefs. Head scarves can also protect hair from the weather, offer comfort during illnesses, or simply be a quick and easy solution for busy days. Wear a classic knot or headband for everyday outings. Choose a chic turban or neat bow for work. Try an elegant side twist or a fancy bow tie for special events. Adjust styles based on the occasion, casual, professional, or formal. Wearing a head scarf is cool because it adds style and creativity to your appearance. Shields your hair from weather and pollution, reducing damage. Represents culture or religion, making a personal or fashion statement. Factors considered for Choosing a scarf Choosing a scarf involves considering several factors. Fabric and Material When choosing a scarf, think about the fabric and material. Cotton scarves are comfy for everyday wear, silk adds a touch of elegance, and wool keeps you warm in colder weather. Consider the length and width of the scarf. A longer scarf offers more styling options, while a narrower one might be better for a specific look. Look at colors and patterns. Choose ones that go well with your outfit and reflect your style. By considering these factors, you can pick a scarf that suits your comfort and fashion preferences for any occasion. Length and Width Consider the size of the scarf. If you want more styling options, go for a longer scarf. For a specific look or if you prefer simplicity, a narrower scarf might be the right choice. Think about your comfort and the style you want to achieve. The right size ensures your scarf fits well with your outfit and enhances your overall look. Colors and Patterns Look at the colors and patterns of the scarf. Choose colors that match or complement your outfit. Patterns can add a playful or sophisticated touch to your look. Consider your style when selecting colors and patterns. Whether you prefer bold and vibrant or subtle and neutral, the right choice can enhance your outfit and express your individuality. Specific considerations for preparing face Clean Your Face Clean your face before wearing a headscarf. Start by using a mild cleanser to wash your face. This helps remove any dirt, oil, or makeup. Rinse your face with warm water to ensure all cleanser residues are gone. Pat your face dry with a clean towel.  Pay attention to areas with more oil or impurities, like the forehead, nose, and chin. Be gentle when cleaning to avoid irritating your skin. Use circular motions with your fingertips. Pat your face dry instead of rubbing it to prevent unnecessary friction on your skin. Moisturize Your Skin Moisturize your face before wearing a headscarf. Pick a moisturizer that is lightweight and suitable for your skin type. Put a small amount of moisturizer on your fingertips and apply it evenly across your face.  Pay extra attention to areas prone to dryness, such as cheeks or around the eyes. Use a modest amount to prevent the headscarf from feeling greasy on your skin. Give the moisturizer a few minutes to absorb into your skin before putting on the headscarf. Irritants on your face irritants on your face before wearing a headscarf. Be mindful of the skincare products you use before wearing a headscarf. Opt for hypoallergenic or fragrance-free products to minimize the risk of irritation.  If trying a new product, test it on a small area first to ensure it doesn’t cause any adverse reactions. Stay away from skincare products with harsh chemicals that may react with the headscarf material. Turban style headscarf Start by folding the scarf into a wide band, ensuring it covers a significant portion of your head. Position the folded band on your head, ensuring the ends are of equal length and situated at the nape of your neck. Cross the ends of the band at the nape of your neck, creating an ‘X’ shape for a secure foundation.  Twist the crossed ends around each other as you bring them to the front of your head. This twisting action adds a stylish element to the turban. Once the ends reach the front, tuck them securely into the wrapped section, concealing the twist and creating a polished turban look. Adjust the turban style by gently pulling or loosening the fabric to achieve your desired look. Ensure it feels comfortable in your head. Basic Techniques to Tie Head Scarf Simple Head Wrap Creating a simple head wrap is an effortless yet stylish way to wear a headscarf. To begin, ensure the scarf is centered on your head, allowing the ends to drape evenly on each side. This foundational step sets the stage for a symmetrical and balanced look. You can experiment with the placement, adjusting the scarf’s position until you find the most comfortable and flattering arrangement. Initiate the wrap by crossing the ends under your chin, forming an X shape. This not only adds a touch of flair but also helps anchor the scarf securely. As you bring the crossed ends to the back of your head, ensure they lie flat and snug against your hair. This step contributes to the scarf’s stability and prevents it from slipping throughout the day.  Classic knot headscarf The classic knot headscarf style begins by folding the scarf into a triangle. Ensuring the fabric is even on both sides. Position the long edge of the triangle along your forehead, with the point facing backward.  Take the two ends of the scarf and tie them securely at the back of your head. This creates a simple knot. After tying the knot, adjust the scarf to ensure a comfortable fit. You can loosen or tighten as needed. The resulting style forms a classic knot at the nape of your neck, offering a timeless and chic appearance. Conclusion Tying a head scarf is not just about fashion – it’s your unique form of self-expression. Whether you

How To Tie A Headscarf Read More »

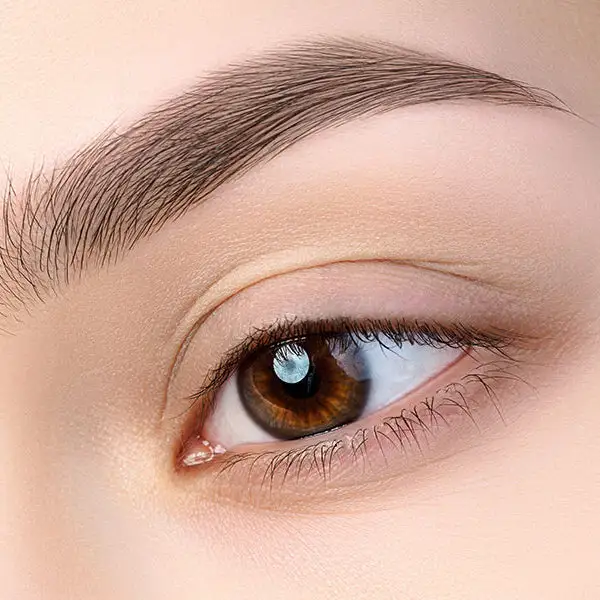
Exploring the Allure of the 2016 Brow

Exploring the Allure of the 2016 Brow

In the ever-evolving world of beauty and fashion, one aspect that has garnered significant attention in recent years is the art of eyebrow grooming. The 2016 brow trend, a pivotal moment in the beauty landscape, marked a departure from the ultra-thin brows of the early 2000s. This transformative shift embraced a fuller, more natural look, revolutionizing the way individuals approached eyebrow styling. The Rise of the Bold and Beautiful Brows In the beauty industry, trends often come and go, but the impact of the 2016 brow cannot be overstated. It represented a departure from the over-plucked, pencil-thin brows that dominated the previous decade. Instead, the focus shifted to a fuller, more natural aesthetic that celebrates individuality. Beauty enthusiasts across the globe embraced the mantra: “bigger is better.” Bold brows became a symbol of confidence and empowerment. Icons like Cara Delevingne and Lily Collins became synonymous with this trend, inspiring countless individuals to put down their tweezers and embrace the natural shape of their eyebrows. This shift was more than a beauty trend; it was a movement promoting self-expression and authenticity. The Anatomy of the Perfect 2016 Brow Creating the perfect 2016 brow requires a combination of grooming techniques and the right products. Achieving a full yet well-defined look involves a step-by-step process that can elevate your entire appearance. Grow Out Your Brows: The first step in achieving the coveted 2016 brow is to let your eyebrows grow. Put down the tweezers and allow your natural shape to emerge. This may require some patience, but the results will be worth it. Define Your Arch: Identify the natural arch of your eyebrows and use it as a guide for shaping. The arch is a crucial element in achieving the 2016 brow look, providing structure and definition to your face. Fill in Sparse Areas: To enhance the fullness of your brows, use a high-quality eyebrow pencil or powder to fill in any sparse areas. This step adds dimension and ensures a polished finish. Invest in Quality Brow Products: Choosing the right products is key to achieving the perfect 2016 brow. Opt for bold and beautiful brow pencils, gels, and powders that complement your natural color. Brush and Blend: Use a spoolie brush to comb through your brows, blending the product and ensuring a seamless finish. This step contributes to the natural look that defines the 2016 brow trend. Anecdotes of Brow Transformation To truly appreciate the impact of the 2016 brow, let’s explore a few anecdotes from individuals who underwent a brow transformation during this trend. Samantha, a marketing executive, shares her journey: “I used to spend hours plucking my eyebrows into thin lines, thinking it was the epitome of beauty. When the 2016 brow trend emerged, I decided to embrace my natural shape. It was liberating to let go of societal expectations and redefine beauty on my terms. Now, my bold brows are a statement of my confidence.” Jake, a college student, reflects on his experience: “I never paid much attention to my eyebrows until I saw how influential the 2016 brow trend had become. I decided to experiment with grooming and was surprised at the difference it made. The fuller look framed my face in a way that enhanced my features, and it became a defining aspect of my personal style.” The Must-Have Products for Achieving the 2016 Brow Look To assist you in your journey to achieving the perfect 2016 brow, here are some must-have products that have stood the test of time: Bold Brow Pencil: A high-quality brow pencil is essential for defining and shaping your eyebrows. Look for a product that matches your natural hair color and has a precise tip for accuracy. Beautiful Brow Gel: A clear or tinted brow gel is crucial for setting your brows in place and adding a touch of glamor. This step ensures that your bold brows stay put throughout the day. Natural Brow Powder: For a softer look, consider using a natural brow powder to fill in sparse areas. This product adds depth and dimension without appearing too harsh. Spoolie Brush: A spoolie brush is a versatile tool for blending and shaping your brows. Use it to groom your eyebrows and achieve a seamless, natural finish. Confidence in Every Bold Stroke As you embark on your journey to embrace the allure of the 2016 brow, it’s important to remember that confidence is the key to rocking this trend. The beauty industry offers a plethora of products designed to enhance your natural features and make a bold statement. Frequently Asked Questions (FAQs) related to the 2016 brow trend: 1. Why was the 2016 brow trend such a significant shift in beauty standards? The 2016 brow trend marked a departure from the ultra-thin brows of previous years, promoting a fuller and more natural look. This shift was significant as it challenged traditional beauty standards, encouraging individuals to embrace their unique features and celebrate authenticity. 2. How do I determine the right eyebrow shape for my face when following the 2016 brow trend? Finding the perfect eyebrow shape involves identifying your natural arch and working with it. The 2016 brow trend emphasized a more defined arch, contributing to a bold and beautiful look. Consider consulting with a professional brow stylist for personalized advice based on your facial features. 3. Can I achieve the 2016 brow look if my eyebrows are naturally sparse? Yes, you can still achieve the 2016 brow look with sparse eyebrows. The key is to use quality brow products, such as pencils and powders, to fill in the sparse areas. Experiment with different techniques outlined in the step-by-step guide to create the illusion of fuller, more defined brows. 4. What are the best practices for maintaining bold and beautiful brows between salon visits? To maintain the 2016 brow look between salon visits, regular grooming is essential. Use a spoolie brush to keep your eyebrows well-groomed and invest in high-quality brow products for touch-ups. Avoid over-plucking and allow your brows to

Exploring the Allure of the 2016 Brow Read More »

The Ultimate Guide to Shaving with Coconut Oil

The Ultimate Guide to Shaving with Coconut Oil

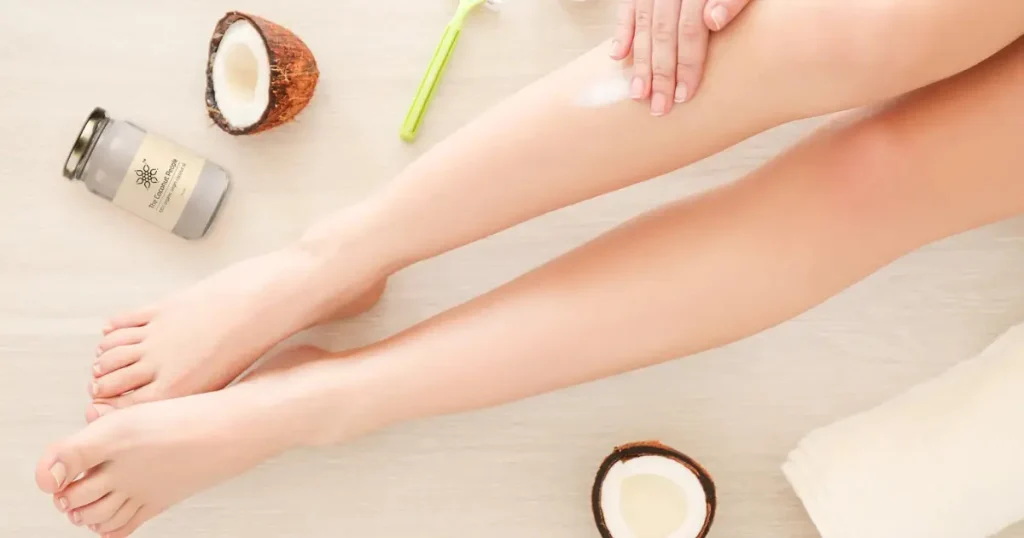
Shaving is a ritual that transcends generations, and finding the perfect shaving companion can make the experience even more enjoyable. One such hidden gem in the world of grooming is the use of coconut oil for shaving. Not only does it provide a smooth glide, but it also offers a plethora of benefits for your skin. In this comprehensive guide, we’ll delve into the wonders of using coconut oil for shaving, exploring its advantages, step-by-step application, and why it deserves a prime spot in your grooming routine. The Marvels of Coconut Oil for Shaving Before we plunge into the art of shaving with coconut oil, let’s unravel the science behind this versatile elixir. Extracted from the kernel of coconuts, this natural oil is rich in fatty acids, vitamins, and antioxidants, making it a powerhouse for skincare. Its antimicrobial properties add an extra layer of protection against potential irritations, setting it apart as a stellar choice for a shaving lubricant. Unlocking the Benefits 1. Moisturization Magic Picture this: a shave that not only removes unwanted hair but also leaves your skin hydrated and supple. Coconut oil is a natural emollient, ensuring that your skin stays moisturized throughout the shaving process. Unlike conventional shaving creams that may contain harsh chemicals, coconut oil pampers your skin, making it an ideal solution for those with dry or sensitive skin. 2. Antibacterial Shield Coconut oil is your skin’s loyal guardian. Its antibacterial properties help prevent infections and irritations that may arise from micro-cuts during shaving. Bid farewell to post-shaving redness and discomfort as coconut oil takes the reins in soothing and protecting your skin. 3. Say Goodbye to Razor Burn Razor burn is the nemesis of every shaver. But fear not – with coconut oil, you can create a protective barrier that reduces friction between the razor and your skin. The result? A smooth shave without the unsightly aftermath of razor burn. 4. Anti-Aging Ally Who says shaving can’t be a part of your anti-aging routine? Coconut oil is brimming with antioxidants that combat free radicals, promoting skin elasticity and warding off premature aging. So, while you bid adieu to unwanted hair, you’re also welcoming a youthful radiance. Step-by-Step Guide to a Coconut Oil Shave Step 1: Preparation is Key Begin your shaving journey with a warm shower or by placing a warm towel on your face. This helps open up your pores, allowing the coconut oil to penetrate deeply, resulting in a smoother shave. Pro Tip: For an extra indulgent experience, add a few drops of your favorite essential oil to enhance the aromatic allure. Step 2: Selecting the Right Coconut Oil Not all coconut oils are created equal. Opt for organic, virgin coconut oil to ensure you’re reaping the maximum benefits. The absence of additives and chemicals makes it a pure and wholesome choice for your skin. Pro Tip: Look for a reputable source or brand to guarantee the quality of your* coconut oil.** Step 3: Application Artistry Scoop a small amount of coconut oil and gently massage it onto the area you intend to shave. Allow the oil to settle for a minute, letting it work its magic in moisturizing and priming your skin. Pro Tip: Don’t be shy with the application – a generous layer ensures a seamless glide for your razor. Step 4: Shaving Symphony With your skin prepped and the coconut oil creating a velvety canvas, commence your shave. The razor will effortlessly glide, capturing unwanted hair while cocooning your skin in the nourishing embrace of coconut oil. Pro Tip: Use short, controlled strokes for optimal precision, especially in tricky areas. Step 5: Post-Shave Elegance Once you’ve completed your shave, revel in the afterglow of a job well done. Rinse off any remaining coconut oil with warm water, pat your face dry, and feel the silkiness that only a coconut oil shave can deliver. Pro Tip: If your skin tends to be on the oilier side, a gentle cleanser can be used to remove any excess oil. Convincing Reasons to Embrace Coconut Oil for Shaving As you navigate the realm of grooming products, it’s essential to consider not just the act of shaving but the entire experience. Here are compelling reasons why making the switch to coconut oil is a decision your skin will thank you for: Holistic Hydration: Unlike traditional shaving creams that may strip your skin of moisture, coconut oil locks in hydration, ensuring your skin stays supple and nourished. Versatility Unleashed: Beyond shaving, coconut oil can be your go-to moisturizer, makeup remover, and even a hair conditioner. Embrace the simplicity of a single product with myriad uses. Nature’s Bounty, Your Skin’s Delight: Mother Nature knows best, and coconut oil is a testament to that. Free from synthetic additives, it’s a pure and natural choice for those who prioritize clean beauty. Economical Elegance: Bid farewell to the clutter of numerous grooming products. With coconut oil, you have a cost-effective solution that caters to multiple aspects of your skincare routine. Guilt-Free Grooming: Cruelty-free, vegan, and environmentally friendly – coconut oil aligns with ethical grooming practices, allowing you to indulge in self-care with a clear conscience. A Glimpse into Coconut Oil Success Stories Let’s take a moment to step into the shoes of those who have embraced the* coconut oil shaving experience. Meet Sarah, a working professional with a penchant for skincare. “I stumbled upon the wonders of shaving with coconut oil during a vacation. Faced with the challenge of limited luggage space, I decided to simplify my grooming routine. Little did I know that this decision would revolutionize my skincare regimen. Not only did the coconut oil provide an unmatched glide during shaving, but it also became my trusted companion for post-shave hydration. Now, whether I’m at home or on the go, my trusty jar of coconut oil is a non-negotiable item in my skincare arsenal.” And then, there’s Mark, a fitness enthusiast with a penchant for precision in grooming. “As someone who hits the gym regularly,

The Ultimate Guide to Shaving with Coconut Oil Read More »

Best Organic Tampons for a Healthier You

Best Organic Tampons for a Healthier You

In the realm of feminine hygiene, women are increasingly turning to organic tampons as a natural and eco-friendly alternative to traditional options. With a growing awareness of the potential health risks associated with conventional tampons, many are seeking products that not only offer comfort and protection but also align with their commitment to a healthier lifestyle. The Rise of Organic Tampons Organic tampons have gained popularity due to their composition, typically crafted from 100% organic cotton. This natural material is cultivated without the use of synthetic pesticides and fertilizers, ensuring a purer and safer product for intimate use. As more women become conscious of the importance of avoiding exposure to harmful chemicals, the demand for these organic alternatives has surged. What Sets Organic Tampons Apart? Chemical-Free Comfort: Unlike their non-organic counterparts, which may contain traces of pesticides and chlorine, organic tampons prioritize purity. This is particularly crucial as the delicate nature of the vaginal area makes it susceptible to irritation and discomfort caused by exposure to harmful substances. Biodegradable Brilliance: Environmental consciousness is a key factor driving the popularity of organic tampons. With a focus on sustainability, these tampons often come with biodegradable or minimalistic packaging, reducing their ecological footprint. This not only benefits the planet but also aligns with the values of those seeking a greener lifestyle. Reduced Risk of Toxic Shock Syndrome (TSS): By steering clear of synthetic materials and chemicals, organic tampons may lower the risk of Toxic Shock Syndrome, a rare but serious condition associated with tampon use. The use of natural fibers, such as organic cotton, promotes breathability and reduces the likelihood of bacterial growth. Choosing the Best: A Step-by-Step Guide Selecting the right organic tampon is crucial for a comfortable and worry-free experience. Let’s explore a step-by-step guide to help you make an informed decision. 1. Understand Your Flow Begin by understanding your menstrual flow. Tampons come in various absorbencies, ranging from light to super. Knowing your flow helps you choose the appropriate tampon for each phase of your period. 2. Check for Certification When browsing for organic tampons, look for recognized certifications such as those from the Global Organic Textile Standard (GOTS) or the USDA Organic Seal. These certifications ensure that the tampons meet stringent organic standards. 3. Consider Applicator Options Organic tampons come with both applicator and non-applicator options. Applicator tampons are often preferred for ease of insertion, while non-applicator versions appeal to those seeking a more environmentally friendly choice. 4. Explore Brand Reputation Research and choose brands with a strong reputation for quality and transparency. Customer reviews and testimonials can provide valuable insights into the performance and reliability of a specific organic tampon brand. 5. Look for Additional Features Some organic tampons offer extra features, such as enhanced leak protection or soothing elements like aloe vera. Consider your personal preferences and any additional features that might contribute to a more comfortable experience. Embracing the Organic Tampon Experience: Anecdotes from Real Women To truly understand the impact of making the switch to organic tampons, let’s delve into the experiences of women who have embraced this organic revolution. Emma’s Story: A Journey to Chemical-Free Confidence Emma, a 28-year-old professional, shares her journey of transitioning to organic tampons. Concerned about the potential health risks associated with conventional tampons, Emma decided to explore organic alternatives. Upon making the switch, she noticed a significant reduction in irritation and discomfort. “It’s like a breath of fresh air,” Emma remarks, highlighting the comfort and peace of mind that organic tampons have brought to her monthly routine. Sarah’s Sustainable Shift For Sarah, a 32-year-old environmental enthusiast, the decision to use organic tampons was driven by a commitment to sustainability. “I love that I can make a positive impact on the environment while taking care of myself,” Sarah expresses. The biodegradable packaging and eco-friendly materials align seamlessly with her values, making her period not only more comfortable but also guilt-free. Why Organic Tampons Are a Worthy Investment Making the switch to organic tampons is more than a trend; it’s a conscious choice for a healthier and more sustainable lifestyle. Here are compelling reasons why investing in these products is a decision you won’t regret. Healthier for Your Body: The absence of synthetic chemicals and fragrances in organic tampons minimizes the risk of irritation and allergic reactions. Your body deserves the best care, especially during your period. Environmentally Friendly: By choosing organic tampons, you contribute to a greener planet. The use of organic cotton and biodegradable materials reduces environmental impact, making it a choice that goes beyond personal well-being. Reduced Risk of TSS: The natural fibers in organic tampons promote breathability, reducing the risk of Toxic Shock Syndrome. Your safety is paramount, and organic tampons provide a reliable option. Empowerment through Conscious Choices: Every purchase is a vote for the kind of world you want to live in. By choosing organic tampons, you support ethical and sustainable practices, empowering yourself and contributing to positive change. Conclusion: Elevate Your Period Experience with Organic Tampons As we navigate the ever-evolving landscape of feminine hygiene, the choice to switch to organic tampons emerges as a holistic and empowering decision. From the comfort they provide to the positive impact on your health and the environment, the benefits are undeniable. Remember, the journey to finding the perfect tampon is unique to each woman. Consider your individual needs, explore different options, and let the experience of real women guide you. The world of organic tampons awaits—a world where comfort, health, and sustainability converge to redefine your period experience. Frequently Asked Questions (FAQs) related to organic tampons: 1. What makes organic tampons different from conventional ones? Organic tampons are crafted from 100% organic cotton, free from synthetic pesticides and chemicals. This natural composition distinguishes them from conventional tampons, contributing to a healthier and more eco-friendly option. 2. Are organic tampons more expensive than traditional tampons? While the initial cost of organic tampons may seem slightly higher, their long-term benefits often outweigh the price difference. Many women find

Best Organic Tampons for a Healthier You Read More »

The Magic of Vaseline Makeup Remover

The Magic of Vaseline Makeup Remover

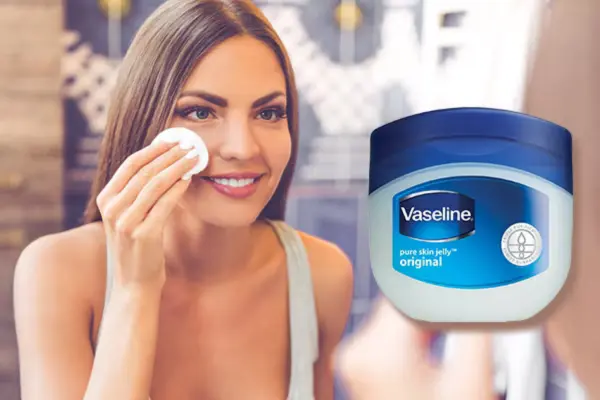
In the vast world of cosmetics, where trends come and go, some timeless solutions stand the test of time. Vaseline, a household name for its versatile uses, has found a new spotlight in the realm of beauty. One of its unsung heroes is the Vaseline makeup remover. If you’re tired of the usual makeup removers that promise the world but deliver less, it’s time to explore this affordable and effective alternative. The Rise of Vaseline Makeup Remover Picture this: a classic beauty routine enhanced by a humble jar of Vaseline. The idea might sound unconventional at first, but beauty enthusiasts worldwide have been raving about the transformative power of Vaseline as a makeup remover. Let’s delve into the details of why this unassuming product is gaining such popularity. The Science Behind It Vaseline, or petroleum jelly, has been a skincare staple for over a century. Its molecular structure forms a protective barrier on the skin, preventing moisture loss. When it comes to removing makeup, this barrier works in your favor. Unlike some harsh chemical removers, Vaseline is gentle on the skin while being highly effective in breaking down stubborn makeup. Step-by-Step Guide to Effortless Makeup Removal 1. Gentle Application: Begin by taking a small amount of Vaseline on your fingertips. The warmth of your fingers will help the jelly melt slightly, making it easier to apply. 2. Targeted Areas: Apply the Vaseline gently to the areas with makeup, focusing on waterproof or long-wearing products. The jelly will start to dissolve the makeup, making it easier to wipe away. 3. Massage and Melt: For eye makeup, gently massage the Vaseline onto your eyelids and lashes. Feel the makeup melt away, including stubborn mascara and eyeliner. 4. Wipe Away: Using a soft cotton pad or tissue, gently wipe away the dissolved makeup. You’ll notice how effortlessly the makeup comes off, leaving your skin feeling nourished. 5. Cleanse and Moisturize: Follow up with your regular cleanser to remove any residual Vaseline and remaining impurities. Finish your routine with a moisturizer to keep your skin hydrated. Benefits Beyond Makeup Removal The magic of Vaseline as a makeup remover extends beyond its primary function. Regular use can contribute to healthier skin, thanks to its moisturizing properties. It’s like giving your skin a mini spa treatment every time you remove your makeup. Why Choose Vaseline Makeup Remover Over Others? 1. Cost-Effective: The price point of a jar of Vaseline is a fraction of what you might spend on high-end makeup removers. Beauty on a budget? Vaseline has got you covered. 2. Multipurpose Marvel: Beyond makeup removal, Vaseline serves as a multipurpose beauty product. From hydrating dry patches to taming unruly eyebrows, its uses are as diverse as your beauty needs. 3. Time-Tested Efficacy: Trust the classics. Vaseline has stood the test of time in the beauty and skincare industry. Its efficacy is backed by generations who have relied on it for various beauty hacks. 4. Gentle on the Skin: Unlike some makeup removers that can be harsh and irritating, Vaseline provides a gentle yet thorough cleansing experience. Say goodbye to redness and discomfort. Anecdotes of Beauty Enthusiasts: The Vaseline Revelation In the ever-evolving world of beauty, anecdotes often carry more weight than product claims. Let’s hear from real beauty enthusiasts who have made the switch to Vaseline as their go-to makeup remover. Sarah, a makeup artist with a thriving online presence, swears by the transformative power of Vaseline. In one of her Instagram posts, she shared a time-lapse video showcasing the effortless removal of a full face of makeup using only Vaseline. The results were astounding, with no residual makeup left behind. Emma, a skincare enthusiast, shared her journey of finding the perfect makeup remover. After trying various high-end brands, she stumbled upon the simplicity of using Vaseline. Her skin felt not only clean but also moisturized, leading her to make it a permanent fixture in her beauty routine. These anecdotes highlight the versatility and effectiveness of Vaseline as a makeup remover. It’s not just a product; it’s a beauty revelation waiting to happen. The Confidence Boost: Why You Should Make the Switch As you consider incorporating Vaseline makeup remover into your routine, let’s break down the reasons why this switch is not just about makeup removal but a confidence-boosting beauty ritual. 1. Embrace Simplicity: In a world filled with complex beauty routines, simplicity often takes a back seat. Vaseline brings back the joy of simplicity, proving that effective beauty solutions need not be complicated. 2. Skin-Friendly Elegance: Your skin deserves to be treated with elegance. Vaseline, with its gentle yet effective approach, elevates your skincare routine, making it a luxurious experience. 3. Wallet-Friendly Luxury: Luxury doesn’t always come with a hefty price tag. Vaseline adds a touch of affordable luxury to your beauty regimen, proving that quality skincare doesn’t have to break the bank. 4. Confidence in Every Swipe: The confidence that comes with flawlessly removing your makeup is unparalleled. With Vaseline, each swipe brings you closer to a canvas of natural beauty, free from the remnants of the day. Final Thoughts: Elevate Your Beauty Routine with Vaseline Makeup Remover In a world inundated with beauty products, finding a gem that stands out is truly a joy. Vaseline makeup remover is that hidden gem, waiting to be discovered and embraced. From its time-tested efficacy to the simplicity it adds to your routine, every aspect contributes to a beauty ritual that goes beyond makeup removal. Frequently Asked Questions (FAQs) related to Vaseline makeup remover: 1. Is it Safe to Use Vaseline as a Makeup Remover? Yes, it is safe to use Vaseline as a makeup remover. Vaseline is a non-comedogenic substance, meaning it does not clog pores. It’s gentle on the skin and effectively removes makeup without causing irritation. However, make sure to follow up with a cleanser to remove any residual Vaseline. 2. Can Vaseline Remove Waterproof Mascara? Absolutely! One of the remarkable properties of Vaseline is its ability to break down and dissolve

The Magic of Vaseline Makeup Remover Read More »

The Ultimate Guide to Chanel Sunscreen

The Ultimate Guide to Chanel Sunscreen

Picture this: You’re lounging on a pristine beach, the sun kissing your skin with a warm embrace. In moments like these, savoring life’s finest pleasures, the last thing you want to worry about is sun damage. That’s where the epitome of luxury and skincare converge—Chanel Sunscreen. Chanel Sunscreen: A Symphony of Elegance and Protection In the realm of sun care, Chanel stands as a beacon of sophistication and reliability. The brand synonymous with timeless elegance has seamlessly extended its touch to skincare, and the Chanel Sunscreen is no exception. Luxury Unveiled: The Essence of Chanel Sunscreen The journey into the world of Chanel Sunscreen is like stepping into a sunlit garden, where every drop of the luxurious formula is meticulously crafted. Imagine a fusion of cutting-edge science and the timeless allure of Chanel—this sunscreen is not just a shield; it’s an experience. The Science Behind Chanel Sunscreen As the sun plays hide-and-seek with the clouds, your skin deserves nothing but the best. Chanel Sunscreen is fortified with advanced UV filters, designed to create an impermeable shield against both UVA and UVB rays. This formulation ensures that your skin is not only shielded from sunburn but also safeguarded against the long-term effects of sun exposure, such as premature aging and dark spots. The texture is an ode to elegance, with a lightweight feel that glides effortlessly onto the skin. No more compromising on comfort for the sake of protection—Chanel has seamlessly merged both. Why Choose Chanel Sunscreen? Transitioning from ordinary sunscreens to Chanel is like upgrading from black and white to technicolor. 1. A Symphony of Ingredients: The secret lies in the ingredients. Chanel Sunscreen is enriched with antioxidants, working in tandem with the sun protection factor (SPF) to combat free radicals. Think of it as a daily dose of pampering for your skin, with elements like Vitamin E and hyaluronic acid ensuring hydration and radiance. 2. Elegance Redefined: Chanel has always been synonymous with sophistication, and their sunscreen is no exception. The packaging itself is a testament to the brand’s commitment to aesthetics, making it an accessory that seamlessly fits into the glamor of your daily routine. Incorporating Chanel Sunscreen into your skincare regimen is like adding a touch of haute couture to your daily life. Step-by-Step Guide: Navigating Your Journey to Radiant Skin Embarking on this luxurious skincare journey with Chanel Sunscreen is a breeze. Here’s your step-by-step guide to elevating your sun care routine: Step 1: Understanding Your Skin Before delving into the world of Chanel Sunscreen, it’s essential to understand your skin type. Whether you have oily, dry, or combination skin, Chanel Sunscreen caters to a spectrum of skin needs with its diverse range. Step 2: Choose Your Perfect Match Much like finding the right shade of lipstick, finding your perfect sunscreen match is crucial. Chanel Sunscreen offers various formulations, from the ultra-light to the rich and nourishing, ensuring there’s a perfect fit for every skin type. Pro tip: The Chanel Sunscreen Finder tool can assist you in discovering the ideal sunscreen based on your unique skin requirements. Step 3: Application Mastery Applying sunscreen is an art, and Chanel has mastered it. Dispense an ample amount onto your fingertips and gently massage it onto your face and neck. Pay extra attention to areas prone to sun exposure, such as the nose, ears, and forehead. Bonus tip: Reapply every two hours, especially if you’re basking in the sun. Step 4: Embrace the Glow Chanel Sunscreen isn’t just a protective layer; it’s a radiant boost for your skin. Enjoy the luminosity it imparts, creating a flawless canvas for makeup or letting your natural beauty shine through. Why Invest in Chanel Sunscreen? Chanel Sunscreen is not just a product; it’s an investment in the health and radiance of your skin. 1. Timeless Elegance: Chanel has been synonymous with timeless elegance for decades. By choosing Chanel Sunscreen, you’re not just investing in a skincare product; you’re embracing a legacy of sophistication that transcends fleeting trends. 2. Dermatologically Tested: Concerned about sensitivities or allergic reactions? Worry not. Chanel Sunscreen undergoes rigorous dermatological testing to ensure it’s suitable for all skin types, even the most sensitive. The Chanel Experience: Anecdotes from Enthusiastic Users Let’s delve into the personal stories of individuals who have woven Chanel Sunscreen into the fabric of their daily lives. Emma’s Radiant Wedding Day: For Emma, her wedding day was a radiant affair, both in love and luminosity. As she glided down the aisle, she attributed her flawless skin to Chanel Sunscreen. The lightweight formula ensured she glowed without a hint of grease, even under the spotlight. Michael’s City Escapade: Michael, a city dweller navigating the urban jungle, swears by Chanel Sunscreen. The anti-pollution properties acted as a shield against the city’s environmental stressors, keeping his skin resilient and fresh amid the chaos. These anecdotes are not just testimonials; they’re testaments to the transformative power of Chanel Sunscreen. Why Your Skin Deserves Chanel Sunscreen 1. Beyond Aesthetics: Chanel Sunscreen goes beyond the surface. It’s not just about aesthetics; it’s about nurturing your skin with the care it deserves. The infusion of skincare benefits elevates it from a mere sunscreen to a holistic skincare ritual. 2. Tailored for Every Lifestyle: Whether you’re a beach lover, a city explorer, or someone in between, Chanel Sunscreen adapts to your lifestyle. It’s a versatile companion, ensuring your skin stays protected, irrespective of the adventures you embark upon. Why Purchase Chanel Sunscreen Today? Chanel Sunscreen is not just a purchase; it’s an investment in the longevity and health of your skin. 1. Limited Editions: Chanel is renowned for its limited-edition releases, transforming everyday products into collector’s items. By investing in Chanel Sunscreen, you’re not just acquiring skincare; you’re capturing a moment in the brand’s history. Act now, and you might secure a limited-edition variant to elevate your skincare routine to collector’s status. 2. Unveil Timeless Beauty: Your skin is an eternal canvas, and Chanel Sunscreen is the brush that unveils its timeless beauty. Embrace

The Ultimate Guide to Chanel Sunscreen Read More »

Where to Stay in Toronto

Where to Stay in Toronto: A Comprehensive Guide to the Best Accommodations

Toronto, the vibrant and diverse metropolis, beckons travelers from around the globe with its eclectic neighborhoods, iconic landmarks, and rich cultural tapestry. Whether you’re visiting for business, pleasure, or a bit of both, the question of where to stay in this sprawling city can be both exciting and overwhelming. Fear not, as we embark on a detailed exploration of Toronto’s most appealing districts and Lisbon accommodations to ensure your stay is nothing short of exceptional. 1. Downtown Toronto Downtown Toronto, often referred to as the central hub, pulsates with life, offering a dynamic blend of business, entertainment, and culture. Home to the iconic CN Tower and the bustling Financial District, this area is a perfect choice for those seeking proximity to major attractions. Luxury hotels like the Fairmont Royal York and the modern chic of the Ritz-Carlton promise a lavish stay, while budget-friendly options like the HI Toronto Hostel cater to the thrifty traveler. Transitioning from the energetic downtown atmosphere to a more serene retreat, let’s explore the charming neighborhoods surrounding the city core. 2. Yorkville: Upscale Elegance and Boutique Bliss Nestled just north of downtown, Yorkville epitomizes sophistication and glamour. Known for its high-end boutiques, gourmet restaurants, and art galleries, this neighborhood attracts discerning travelers. The iconic Four Seasons Hotel stands as a testament to luxury, offering opulent suites and impeccable service. For a more intimate experience, boutique hotels like the Hazelton Hotel provide personalized attention amid the upscale charm of Yorkville. Venturing westward, we find ourselves in the trendy district of Queen Street West. 3. Queen Street West: Artsy Vibes and Bohemian Flair Queen Street West, often dubbed one of the coolest neighborhoods in the world, is a haven for art lovers, fashionistas, and anyone with an appreciation for the eclectic. The Gladstone Hotel, a historic boutique hotel, captures the artistic essence of the area with its artist-designed rooms. Budget-conscious travelers can opt for the HI Toronto Hostel in this vibrant locale, offering a unique blend of affordability and cultural immersion. Now, let’s explore the historic charm of Old Toronto. 4. Old Toronto: History Meets Modern Comfort Steeped in history, Old Toronto transports visitors to a bygone era with its cobblestone streets and heritage architecture. The iconic Fairmont Royal York, a landmark in itself, offers a luxurious retreat in the heart of Old Toronto. For those seeking a more intimate setting, bed-and-breakfast options like the Gibson House Bed and Breakfast provide a cozy escape within walking distance of historic sites. Heading east, we encounter the diverse and lively neighborhood of Leslieville. 5. Leslieville: A Hip Haven for Creatives Leslieville, once a well-kept secret, has blossomed into a trendy district known for its artistic community and diverse culinary scene. The Broadview Hotel, a historic landmark turned boutique hotel, offers panoramic views of the city skyline. Meanwhile, budget-friendly options like the Planet Traveler Hostel provide a comfortable stay for the budget-conscious traveler looking to explore Leslieville’s unique charm. Now, let’s explore the vibrant and multicultural enclave of Kensington Market. 6. Kensington Market: Global Flavors and Artistic Splendor Kensington Market, a melting pot of cultures, is a kaleidoscope of colors, sounds, and flavors. Staying true to the area’s bohemian spirit, the Kensington College Backpackers Hostel provides budget-friendly accommodation with a communal atmosphere. For a more upscale stay, the Thompson Toronto offers contemporary luxury amid the eclectic energy of Kensington Market. As we conclude our journey through Toronto’s diverse neighborhoods, let’s consider some general tips for selecting the perfect accommodation. Conclusion: Choosing Your Perfect Toronto Abode In a city as vast and diverse as Toronto, selecting the ideal place to stay depends on your preferences, budget, and the experience you seek. Whether you’re drawn to the pulsating energy of downtown, the upscale allure of Yorkville, the bohemian charm of Queen Street West, the historical richness of Old Toronto, the artistic haven of Leslieville, or the multicultural mosaic of Kensington Market, Toronto has a neighborhood and accommodation that suits every taste. Remember to consider factors such as proximity to attractions, transportation options, and the unique atmosphere of each neighborhood. Booking in advance, especially during peak seasons, ensures you secure the best rates and availability. Utilize online resources such as booking.com, Airbnb, and TripAdvisor to read reviews and gain insights from fellow travelers. Now armed with this comprehensive guide, you’re ready to embark on your Toronto adventure. Whether you choose the glamor of Yorkville, the artistic vibes of Queen Street West, or the multicultural flair of Kensington Market, Toronto’s diverse neighborhoods are sure to leave you with lasting memories of a truly unforgettable stay. Happy travels! Frequently Asked Questions Related to staying in Toronto: Q: How do I choose the right neighborhood to stay in Toronto? Choosing the right neighborhood depends on your preferences. Downtown is ideal for proximity to major attractions, Yorkville for upscale experiences, Queen Street West for a bohemian vibe, Old Toronto for historic charm, Leslieville for a creative atmosphere, and Kensington Market for multicultural exploration. Consider your interests and the kind of experience you want. Q: What are some budget-friendly accommodation options in Toronto? Toronto offers various budget-friendly accommodation options. Hostels like HI Toronto Hostel, Planet Traveler Hostel, and Kensington College Backpackers Hostel provide affordable stays. Additionally, booking sites like Hostelworld can help you find budget-friendly options. Q: Are there any iconic hotels in Toronto known for luxury stays? Absolutely! Toronto boasts iconic luxury hotels such as the Fairmont Royal York, the Ritz-Carlton downtown, and the historic Four Seasons Hotel in Yorkville. These hotels offer opulent accommodations and exceptional service. Q: What is the best time to visit Toronto for the most enjoyable stay? The best time to visit Toronto is during the late spring to early fall (May to September). The weather is pleasant, and numerous outdoor events and festivals take place. However, if you prefer a quieter experience, consider visiting during the shoulder seasons in the spring or fall. Q: How can I ensure the best rates and availability for accommodations in Toronto? Booking in advance is

Where to Stay in Toronto: A Comprehensive Guide to the Best Accommodations Read More »

Ready to take your content to the next level? Contact Trendin Hub today and discover how our expert writing services can help your business thrive.

Contacts

Recommended Website

Important Links

Featured Posts

Copyrights © 2024 Developer Company  | SEO Magic Box | By Muzamil Akram

Scroll to Top